Pousse Seringue / Arduino / ESP8266 / LAAS-HW
Données préliminaires
-
Hardware
- A4988 breakout
- A4988 wiring
- Stepper: 17HS19-2004S1
- 200steps 1.8°/step 2A/φ 1.4Ω/φ
- WIRING: 1A/A-/grn 1B/A+/blk 2A/B-/blu 2B/B+/red
- Wiring ref1
- Wiring ref2
- Stepper: 11HS18-0674S
- 200steps 1.8°/step 2A/φ 1.4Ω/φ
- WIRING: 1A/A-/grn 1B/A+/blk 2A/B-/blu 2B/B+/red
-
Arduino libraries (git-clone dans le répertoires des librairies Arduino)
Installation des drivers et outils de compilation
Installer toutes les dépendences:
Créer un espace de travail: mkdir -p ~/devel/workspace/src
Cloner les paquets suivant dans le dossier ~/devel/workspace/src.
- Compiler and driver pour le esp8266 arduino (coeur arduino).
- Fournisseur d'interface web pour arduino. On l'utilise pour l'interface graphique
- Parseur de fichier Json pour arduino.
Pour compiler sur la cible :
Pour compiler sur le PC (pour test) :
- Remplacement du serveur web asynchrone. (les librariries Async* ne sont pas compilables sur PC)
- WebSocket driver pour arduino. Utilisé pour la compilation locale de l'interface graphique web.
mkdir -p ~/devel/workspace/src
cd ~/devel/workspace/src

git clone --recursive git@github.com:esp8266/Arduino.git arduino_esp8266
git clone --recursive git@github.com:s00500/ESPUI.git
git clone --recursive https://github.com/bblanchon/ArduinoJson.git
# pour l'esp8266 seulement
git clone --recursive https://github.com/me-no-dev/ESPAsyncWebServer
git clone --recursive https://github.com/me-no-dev/ESPAsyncTCP
# pour emulation sur PC seulement
git clone --recursive git@github.com:d-a-v/emuAsync.git
git clone --recursive https://github.com/Links2004/arduinoWebSockets.git
On récupère la chaine d'outil pour compiler sur arduino
cd ~/devel/workspace/src/arduino_esp8266/tools/
./get.py
Pensez à verifier l'installation en suivant les instruction du paragraph suivant.
Vérification de l'installation:
Emulation de l'interface graphique
Pour verifier sir l'émulateur fonction on fait tourner un test unitaire d'ESPUI.
export ESP8266ARDUINO=~/devel/workspace/src/arduino_esp8266
export ARDUINOLIB=~/devel/workspace/src/
cd ~/devel/workspace/src/
./emuAsync/tests/ESPUI-gui
Cela devrait compiler le test et creer un executable gui.
Celui ci se trouve afficher dans le terminal entre deux flèches:
----> ~/devel/workspace/src/arduino_esp8266/tests/host/bin/gui/gui <----Vous l'éxecuter:
~/devel/workspace/src/arduino_esp8266/tests/host/bin/gui/guiEt vous ouvrez firefox sur localhost:9080:
firefox localhost:9080Compiler et flasher la carte:
IDE Arduino
@todo
PlaterformIO
- Visual Studio Code: Download Visual Studio Code, either from https://code.visualstudio.com/ or from the repository manager of your OS. Install it.
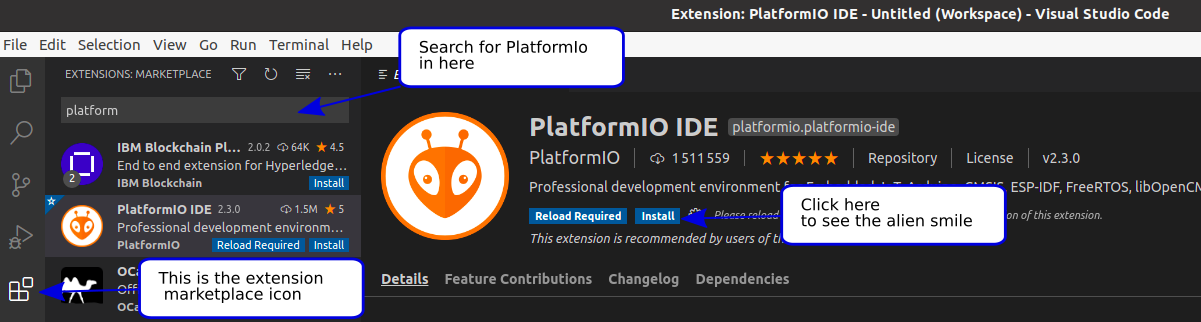
- PlatformIO: Launch Visual Studio Code. On the left side menu, click on the extension icon
 .
.

In the search engine, type "PlatformIO IDE", and click install. Finally, restart Visual Studio Code when you are prompted to do so.
Now we will download the code from Git to Visual Studio, and compile it.
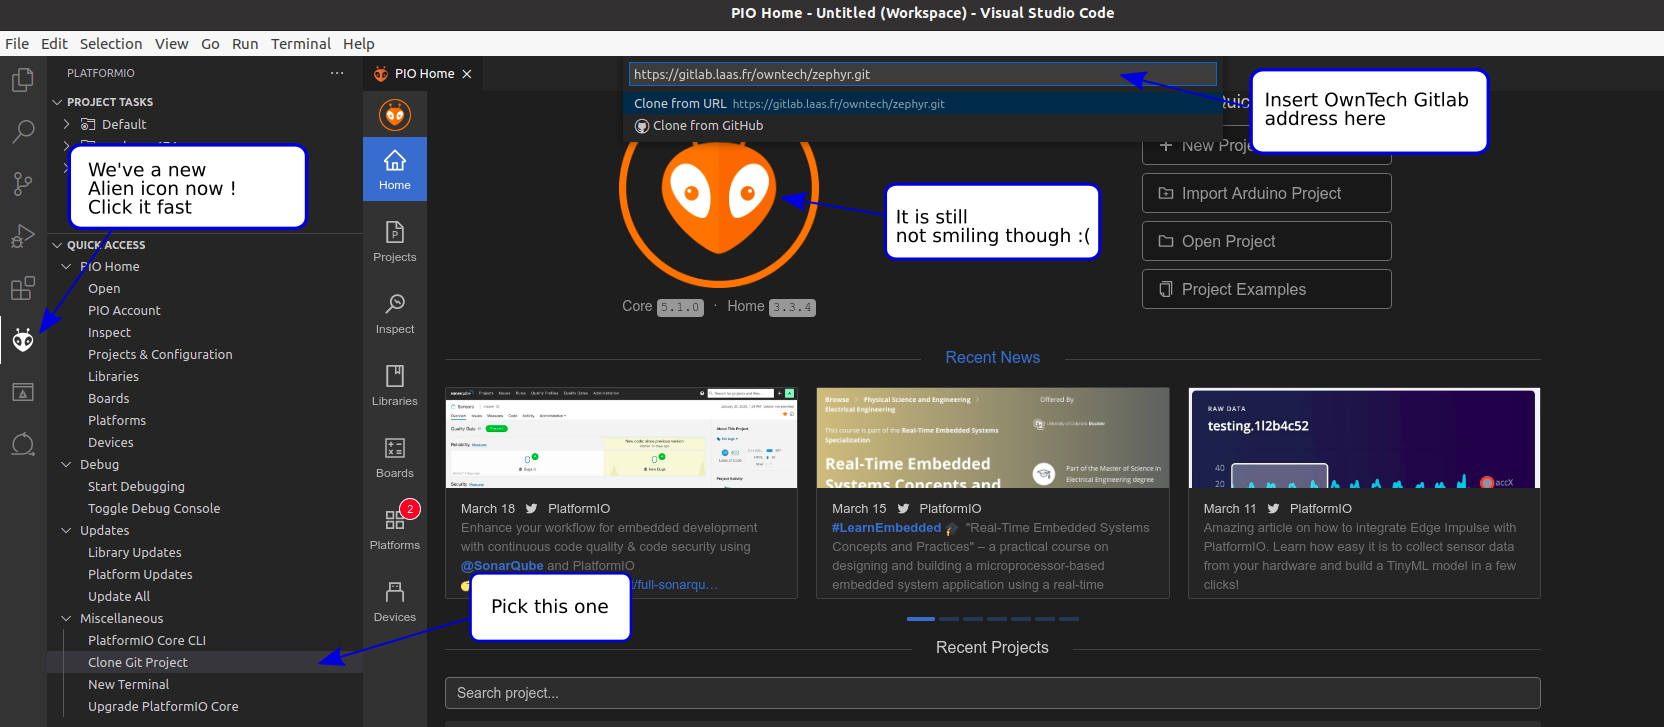
- In Visual Studio code, on the left side menu, click on PlatformIO icon ! Pro tip: if the alien icon does not show up spontaneously, wait for a few more seconds, then press F1 key and type platformio home.
- In Platform.io, select "Clone Git Project ". PlatformIO will automatically open a field in which you can type
https://gitlab.laas.fr/fablaas/pousseseringue/pousseseringue-arduinoand press enter. PlatformIO will ask you in which folder to clone the project. Choose the folder you have created previously. A pop up will appear asking if you trust the authors. You can trust us. 😄

⚠️ Make sure that the name of the cloned project has no space in its path as it would create issues.
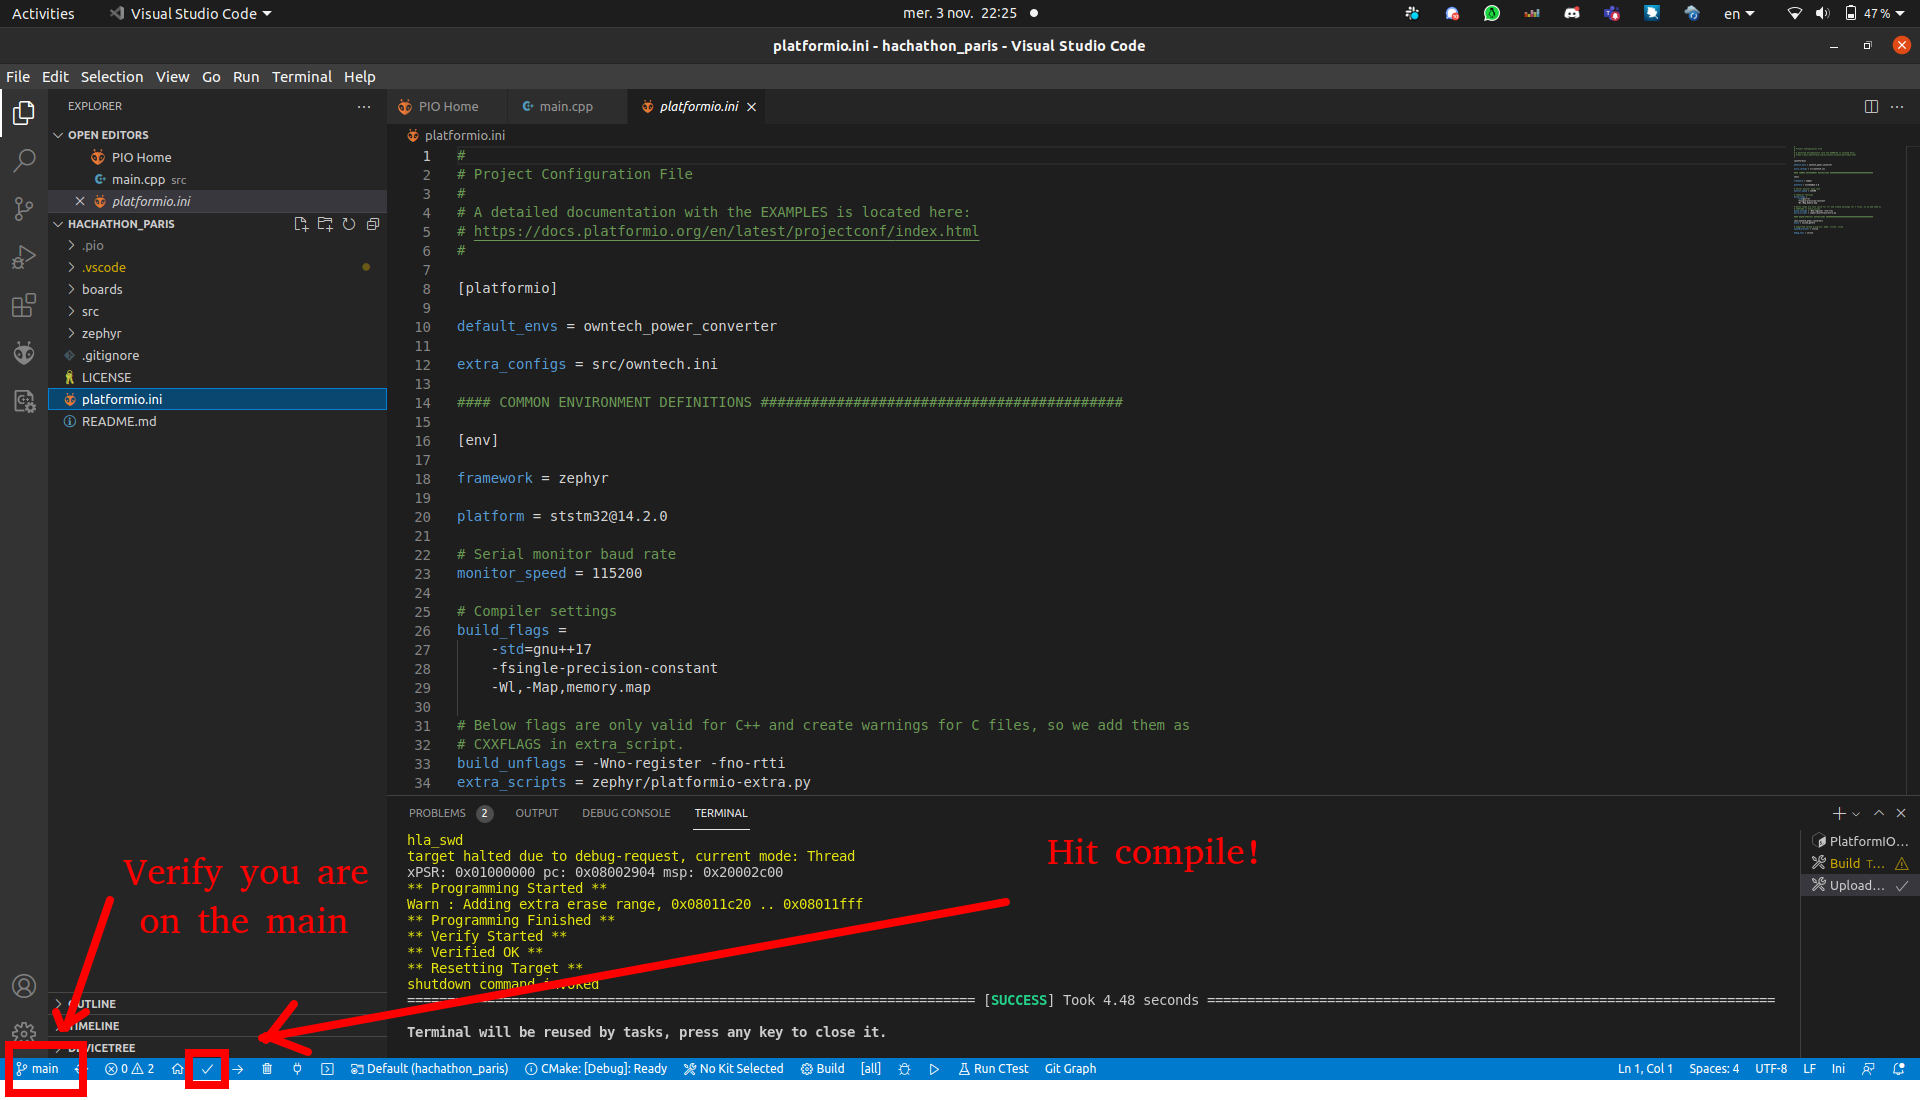
- Make sure you are on the main branch of the Git project. You should see the following file tree.
Step-by-step implementation
- Connect hardware
Now we will connect the serynge to the PC with a micro USB cable.
- Build and Upload
- In the bottom menu, click on the Build icon . This will launch the compilation of the code. If this is the first time that you compile, Visual Studio Code will download several extensions that are required to write the code onto the serynge microcontroller. When the compilation is completed, you should see [SUCCESS] in the terminal.
- In the bottom menu, click on the Upload icon . This will flash the compiled code on the microcontroller of serynge. When the process is completed, you should see [SUCCESS] in the terminal.


⚠️ For Linux users, you may have the LIBUSB_ERROR_ACCESS error when uploading to the board, check your udev permissions: https://community.platformio.org/t/stm32-vs-code-mbed-upload-issue-error-libusb-open-failed-with-libusb-error-access-error-open-failed/10650
- In the bottom toolbar, click on the Serial Monitor icon . You will be able to see the messages from the serynge in the terminal.

That’s it!
ESP
@todo
Visualization locale de l'interface utilisateur sans l'arduino.
Compiler l'application localement:
# se positionner dans pousseseringue-arduino/
export ESP8266ARDUINO=~/devel/workspace/src/arduino_esp8266
export ARDUINOLIB=~/devel/workspace/src/
cd host_gui
./make.sh
lancer le server:
${ESP8266ARDUINO}/tests/host/bin/pousseseringue-arduino/pousseseringue-arduinoSome code details explanation
CORE_MOCK
Ce CORE_MOCK permet d'ignorer les ligne qui sont spécifique au micro-controller
afin de compiler le driver sur le PC local. Cela permet notamment de visualiser
le gui sans avoir la carte éléctronique physiquement et de la flasher.
#if !CORE_MOCK
  // on the target
#else // !CORE_MOCK
  // on host
#endif // !CORE_MOCK